


Fitness Friday: How to Make a Non-Skid Portable Workout Floor Mat
Posted by the superdiva, dk on Jun 21, 2013 in fitness friday, insanity workout, superdiva, workout floor mat | 8 comments
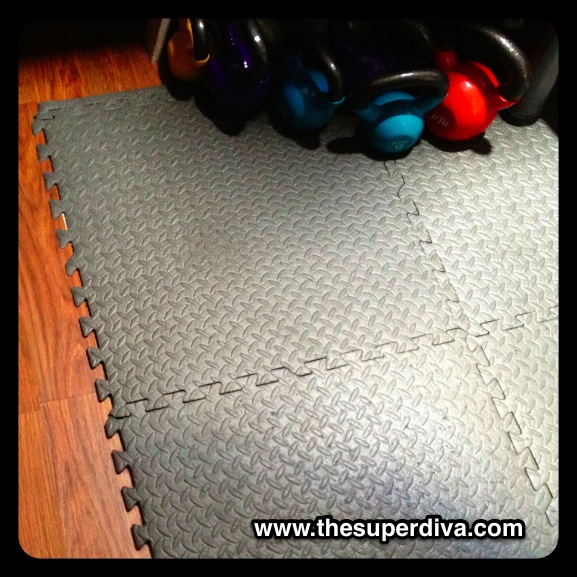
Years ago, I use to say to myself, “If only I could get rid of the carpet, I’d workout more.” Shortly afterwards, I ripped up the carpet and put in a faux hardwood floor. Yes, I put in the floor complete with mitered baseboards all by myself! How I did that will be in another post. Now, here I was with this nice new floor . . . and I still didn’t workout. The floor over a concrete foundation was too hard and it had no give. Excuses, excuses, I know. Seriously, though it was awful. So, I purchased a cushioned puzzle piece style interlocking floor mat.
Sure, it still took me a while to finally get in the habit of working out, but the cushioned floor certainly eliminated a major excuse. After actually using the interlocking floor mat, the mat tiles started to slide around. I cut some non-skid carpet padding into strips and placed them underneath each of the 2′ x 2′ pieces of the floor mat. It worked until I started doing more high intensity exercises like burpees, sprawls, mountain climbers, and the craziness that goes with the Insanity workout. Faced with the prospect of replacing some of the mat tiles, I decided to look for a new floor mat in hopes that I could find something better.
 Lo and behold, I stumbled upon a Martha Stewart tip on Pinterest. The photo showed how instead of non-skid carpet padding you could just use lines of caulking! Of course, I had to try it. Being the household DIY superdiva that I am, I already had PLENTY of caulking!
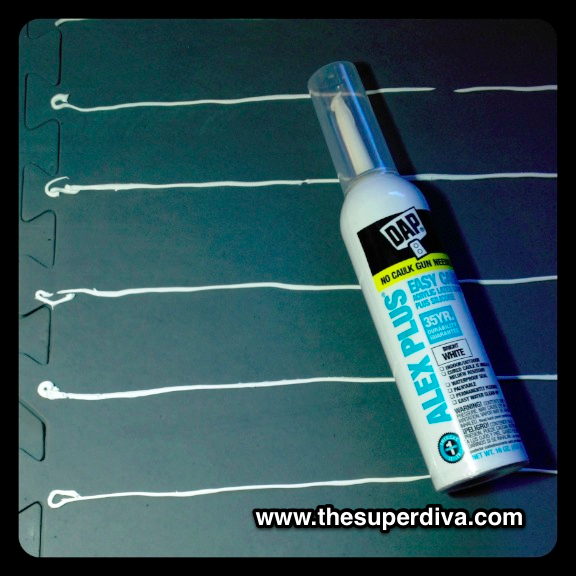
I’m a huge fan of DAP’s No Caulk Gun Needed Easy Caulk. The caulking is in a pressured can. Neither OSH or Home Depot seem to carry the Easy Caulk. I found mine at Target. All I have to do is tilt the long tip forward to dispense the caulking! Genius. It reduces the mess of working with a caulking gun and makes caulking a joy instead of a dreaded clunky mess.
I applied caulking lines about 3 or 4 inches apart on one of my floor mat tiles. I even squirted a dot on each of the puzzle edges where they connect together. Don’t worry about making it neat. No one will see it! I decided to leave the non-skid carpet padding in place and just put the mat now with caulking directly over it. I’ve since completed a week’s worth of Insanity workouts and the mat hasn’t moved. I now spend less time worrying about sliding or destroying the mat and more time lamenting my decision to do Insanity . . . 😛
Even though the mat is portable, I just leave it on the floor. It is so easy to put together that if you have company over and/or just wish to move it, taking it up and putting it back down is so simple. If you can assemble an 8 or 9 piece puzzle, you can handle this floor. It is a non-skid portable workout mat with a superdiva twist! Enjoy your next workout . . .
© 2013, the superdiva, dk. All rights reserved. www.thesuperdiva.com
Related Posts
 Fitness Friday: The Weighted Hula Hoop
 Fitness Friday: Daily Burn
 Fitness Friday: Kettlebell Workouts on YouTube
 Fitness Friday: My Insanity Workout Journey and Final Results
 Fitness Friday: Chia Seeds, Energy Gels, and An Insanity Workout Update
 Fitness Friday: Working Out in Portland, PlantFit Training Studio, and Skogg Gym
8 Comments
Leave a Reply
FOLLOW ME!
About Me
 I am happily vegan. I know nothing. I learn as I go. I make mistakes . . . laugh at myself and then take something away (good or bad) from the experience. Oh . . . I also hate to read instructions! :P


This is absolutely genius. I am about to purchase an interlocking floor mat because doing Insanity on our linoleum floor is hurting my feet and ankles more than the workout! I’m slipping and sliding all over the place. I wondered if nonskid carpet stuff would help now I know I can just skip that step! I’m wondering, will the caulk damage the floor at all???
Hi Crysten,
I don’t think the caulk would damage the floor. Although since the Insanity workouts are so crazy, I’d probably use both the non-skid carpet pad and caulking if you’re really worried about it. I took a non-skid carpet pad and cut it into 6-8″ wide strips the length of the mat and spaced them about 4-6″ apart so I didn’t have to buy a pad big enough for my mat space. 😉
I’m glad you like the idea! Thanks for commenting and good luck with Insanity! 😀
Thank you so much! I’m excited to try again without worrying about breaking my ankles. I found a high intensity 1″ thick exercise interlocking floor mat I’m going to try. You’re awesome!
Awww, gee, shucks! I’m glad I could help. You are most welcome!
Hi, hope you are doing great. Thanks for the tip. I read somewhere else (http://blog.trashbackwards.com/2013/04/07/diy-busters-no-slip-carpet-fix-gone-bad/) that this tip didn’t work for someone else. How is this holding out for you.
Hi Anand,
I workout five days a week and my workout floor is still going strong! Since I had already tried the no slip rug strips, I just left them on the floor and placed the portable floor tiles with caulking on top of it. I didn’t think the caulking would hold up over time while I did Insanity anyway! It has been over six months and I’d say I’m still pleased.
Thanks for the comment. I hope I was helpful. 😉 Please let me know if you end up trying it out!
DK
Hello,
Great tip! But I have one question , do you let the caulk dry before laying the mats down or do you lay the mats down while the caulk is still wet. I used the gym mats for my boxing training, so it’s important that thise mats dont slip underneath me while training lol.
Hi Jaime,
I would make sure the caulk is fully dry before laying the mats down. You also want to make sure that you periodically pick them up and clean both the bottom of the mats and the floor. An accumulation of dirt and dust underneath can cause the mats to slip over time.
Thanks for the comment. Good luck!
DK